Showing posts with label Cricut. Show all posts

Wednesday, August 1, 2012

Wrapping Up Some Things


I finished my House Warming gifts which included these Wampus CAT throws for 2 little guys.


And these throws come wrapped in a great piece of ribbon with Velcro to hold them closed.  I have always thought how I should monogram a name on the ribbons but have never taken the time to do it.  Well....


this time I did it.  I monogrammed both names on one piece of stabilizer.  It was so quick and easy.  Then I slipped them back on the throws.  I think it makes them really special.


Last night I started this shirt.  In case you can not tell the design called for two shades of purple thread.  {Who is in a darker purple}.  I knew it would be close on the medium purple thread but I was hoping I would have enough and not run out.  Well I did run out on "about".  I got as far as ab.....


Luckily I was going out of town today where I could purchase thread.  It is Sulky #1032 and Hancocks Fabric had 2 in stock!  and 30% off.  I was able to come home and finish my little shirt. Moral of this story...don't even try to stitch something if you think you may not have enough thread!


I'm also working on LSU cups...just a nice change of pace.


I want to find a better Fleur de Lis.

Fun, no pressure project :)

Happy Thursday!

Wednesday, July 25, 2012

Hodge Podge Wednesday


My daughter placed her "order" for this pillow.  Of course I couldn't wait to make it.  It is the coordinating pillow to her anniversary pillow. They will be in matching chairs in her living room.

 I took pictures along the way in case anyone wants to see the process step by step.  Please let me know and I will post all of them.  The first step was to cut a piece of burlap for the front of the pillow.  Step 2 was to make my stencil.  I used my Cricut and card stock.  These letters were 5" each.  I taped them together and taped them to front of pillow.  Then painted them with craft paint.

Removed the stencil and let it dry.  Ready to make into an envelope pillow.


LSU shorts


I ordered my pattern from
Viola Lee Patterns
on Etsy
This pattern was made for a beginner.  I love them!


Whipped up a matching shirt and this little girl is ready for some football.
LSU Tiger Football!
My Tiger friends are counting down the days for me.
38 Days until Kickoff!

Are your little Tiger fans ready?


Sneak preview of 9 Frocket tees.  Yes 9!
More about that later.


Working on more burlap things, Halloween pillows and of course more LSU and Wampus CAT spirit shirts for my little friends.

XOXO,
Karen

Tuesday, June 12, 2012

Anniversary Pillow

 My daughter saw a pillow like this on Pinterest and talked about how much she liked it.  So I went to YouTube (if you're not using YouTube for how to's, you're missing out).  I searched how to stencil on burlap.  Little did I know it would be so very easy.  So I practiced "my painting technique" (hehe) and it came out nicely.  Remember that this is a Shabby Chic/French Country look so it doesn't have to be perfect.  In fact you want it to look like it's been passed down from a grandmother or great-grandmother.

So here are the steps to make a stenciled burlap envelope pillow:
1) decide on the size pillow you want (I use pillow forms instead of fiberfill).  For this I used a 12"x16" form.
2) cut the front panel 1" larger in length and width.  So for a 12"x16" pillow I would cut my front fabric 13"x17"
3) Now make a stencil using your Cricut or any electronic cutter or buy a stencil.  I made my numbers 4".  I used my Plantin SchoolBook cartridge.  It is really a great cartridge.  Love the basic alphabet and numbers.  Using a temporary fabric adhesive, I adhered my stencil to the fabric.  (the spray will evaporate on its own in a few hours and leaves the fabric just as it was before spraying it.
4) I used white acrylic paint and a sponge brush.  My daughter wanted white numbers but I think black would look great, too.  I dabbed the paint on, remember it's a Shabby Chic look.
5) Let it dry.  Only takes a few minutes.  During this time I prepared the back of the pillow.
6) I used Muslin fabric for the back for 2 reasons: I ran out of burlap and I thought the Muslin would give it some stability.  My burlap is a loose weave so I was afraid the stitches might not hold too well but I was also out of burlap :)  It worked well.
7) Cut your back fabric 1" longer in length and 4" longer in width.  This gives you the extra fabric for the envelop opening.  So for a 12"x16" pillow I cut my back fabric 13"x 21".  I was adding 4" to the 17".  Does that make sense?
8) Now cut your back fabric in half vertically.  Hem the inside edges that will be the opening. ( You may want to watch a video on YouTube for that part)
9) Put front fabric and back fabric together (pretty sides touching each other).  Pin and stitch all around the pillow.  I used a 1/4" seam.
10) Clip your corners so that they will turn easily.  Turn pillow case to the right side, insert pillow form and voila a beautiful DIY stenciled pillow. 
I'm going to do a large initial pillow also for my daughter.  We will use a 14"x14" pillow form.  So I will cut the front 15"x15" and the back 15"x19".
Easy, easy!


I found this jute at WalMart the other day.  It's called Jute but it looks like burlap to me.  Maybe that's what jute is but I love it.  I'm thinking bows or making a wreath.  What do you think?  It is only 67 cents a yard.  I'm sure I'll think of something.

I'm leaving on a jet plane tomorrow :)
I'm heading to Atlanta to visit family.  It has become a summer ritual to visit my brother and his family out there.  He and my sister-in-law moved from Winston-Salem three years ago and I'm so happy they did.  Now they are much closer.  I plan to take lots of pictures to share.  My sister-in-law loves to shop and so we'll hit Ikea, HomeGoods, Tuesday Morning and all the other fun shops.  Maybe I'll get some good ideas and bargains.  Have a great rest of the week!

XOXO,
Karen

Friday, June 1, 2012

Grayson's Coming to Bella's!


Grayson is coming to spend the week with Bella & Papa Asa.  We are so excited! Grayson is old enough to attend Vacation Bible School this year so he and I will go every evening.  He is going to have such a great time at VBS because his teachers are the most wonderful ladies who love working with little folks.  Of course we will not spoil him one bit, but if he happens to want to eat while watching TV I personalized a bright red lap tray for him :)  He can color or eat on his tray.  I used polka dots and "Girls Are Weird" font for his name.


In the mornings before VBS, Gray will be learning to swim.  A good friend has a pool and her daughter will be teaching him basic swimming techniques.  I can't wait to see that little guy in the water.  It seems like yesterday that I took his mom and uncle Clint to swim lessons.  He has to be a champion swimmer because Bella and Papa Asa met each other while working as lifeguards.  We worked every summer during our college years as lifeguards so it's in his bloodline to swim.  (Hehe) 
I also made Little GrayMan a personalized tote for all of his cars, books, Legos or whatever he wants to put in there.  Once again I used "Girls Are Weird" font and added stars.  I used my Cricut and vinyl to personalize these things.


I saw this adorable activity chair on Pinterest and then found it online at WalMart. I had it delivered to our store....so easy to do.  Thank you WalMart for making it so easy to order online. (However, it took me over an hour to put it together) Won't he be soooo cute sitting in it and drawing a picture or coloring?  Ok, ok enough of being a typical grandmother....sorry.

I hope you all have a wonderful weekend!
XOXO,
Karen

Thursday, May 24, 2012

Last Day of School!

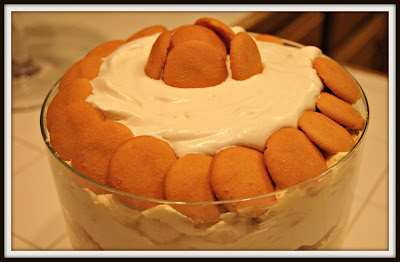
 Banana Pudding

Tomorrow is the last day of class for students and teachers and then school's out for summer!  I will continue to work off and on during June and July but I will be at home a lot, too which I love.  After our students leave at noon tomorrow we are having a faculty lunch.


Our principals are providing crawfish and burgers (for those non-crawfish eating folks) for the big celebration.  Our job was to provide the desserts.  Remember the Paula Deen magazine from the last post?  This is the cover recipe.  It looked so delicious and sounded easy so I gave it a try.  My "taste-tester (Aka-husband) gave it the "it's really good seal of approval".


I had enough left over that I could make him a mini banana pudding.  It has cream cheese, heavy whipping cream, 4 boxes of pudding, milk, Cool Whip and sour cream....it has a few calories in it :)


Remember the plain mugs I showed you a couple of posts back?  This is the finished gift.  I put permanent vinyl stars (cut by my Cricut using the  Plantin SchoolBook cartridge.  Then I made Bunny Bark but I am calling it Red, White & Blue Bark. I used red, white and blue candies and sprinkles.


The only Oreo cookies that I had on hand were Mint so there is a touch of green that really messes up my color scheme :)  Anyway, I put the bark in large treat bags and tied them up with more red ribbon.


These are going to school tomorrow to give to special friends that have helped me through this year.  I'm thankful for those friends at work, for a good year..... no great year (our school district is ranked 6th in the state!), for a safe year and for all that I have learned this year about children.  I hope that I have made a difference in one child's life because that's why every teacher I know teaches, not for the money or the fame or even thank yous but because we love children. 
Hugs and Kisses to all the teachers out there and for the difference you make every day!

Happy Last Day of School & Memorial Day Weekend! 

Karen

Friday, May 11, 2012

Just About Finished


I took off a half day today because I needed some rest.  A long nap sure does help.  Tonight I wanted to finish my "girly" graduation gifts.  I like bright colors especially for teenage girls.  It is perfect for young college girls.  I monogrammed towels and put vinyl initials on a large pail.  Once again I used Monogram KK for the towels and pail.  The pail can be used for just about anything in a dorm or apartment.  So there it is.......finished!
And I'm off to sleep again.  I haven't caught up yet :)
Good Night!
Karen

Thursday, May 10, 2012

Mother's Day & Birthday Gifts


A few more gifts I've been working on.  These are for Mother's Day and one for a friend's birthday.  I used Monogram KK which is a free font from
Using my Sure Cuts A Lot software I cut the initials from vinyl on my Cricut.
It is a favorite font of mine and it actually cuts very well to be so curly. I think these make great gifts for any occasion and especially if a homemade cake is included. 
Happy Mother's Day Weekend!
XOXO,
Karen

Wednesday, March 21, 2012

Unexpected Holiday

Yesterday it started raining after noon and it continued to rain through the night.  It was not just a slow rain, it was a torrential rain.  Our parish and neighboring parishes were flooded in many areas.  Schools were closed today.  However, all of that has moved out and at least in our area, the water is no standing in our yards. My son travels about 50 miles to work and another 50 miles home.  I pray every morning for his safety to and from work.  Little did I know that yesterday on his trip home that he would encounter a tornado on the highway.  One of the girls that is in his carpool had the composure to video the whole experience.  It was very scary for them.  They are safe but it sure gives us something to be thankful for and something to talk about :) 
So on my rain day holiday from work this is what I did...

My newest recipe from Pinterest....
Bunny Bark
It is so delicious and fun to make.  It is even more fun to give away.  This is my 3rd time to make it.  The first I made over the weekend.  I didn't have Oreo cookies on hand so I used Do-si-dos (my Girl Scout cookies).  It really has been the best tasting batch that I've made.  But Oreos are yummy, too.
The recipe and source can be found HERE.

I have a state convention to attend this weekend.  My good friend is the state president ( I think I've shared that with you before).  I just had to take her a little something because I'm so proud of her and because it never hurts to be in good graces with a state president :) I figured a pail filled with Bunny Bark and other goodies would work.  

I found this adorable polka dot pail at Target.  Using my Cricut I cut her initials with my software and vinyl.  Then I added lots of treats. 

I also had a couple of burp cloths to stitch for Baby Samuel.  I made them coordinating.

This almost looks like a sunflower to me.

Same fabric and same thread colors

I hope everyone is ok after our rains/flood.
For me it was an unexpected holiday.  I enjoyed it but it's back to work tomorrow.
Have a good Thursday.
XOXO,
Karen

Friday, February 17, 2012

Our Little Butterfly

I've been out of touch this week.  I have been under the weather all week but not enough to go to the doctor.  I was hoping I could kick this sinus/cold on my own and I think I have :)  I'm much better tonight.
Our Sloan is turning 1 and we have her party tomorrow.  My job was her birthday shirt.....{no pressure of course}  I always procrastinate when I'm afraid to tackle something. 
This is her birthday party invitation...my job was to come up with a shirt to match. 

I started with the birthday number and pennants from "Hang To Dry".  I then added a butterfly from "Joyful Stitches", my favorite little flower from "Embroidery-Boutique and topped it off with her name in Fantini Swoop from "8 Claws and a Paw".

My daughter said it looks just like the invitation!  Yah!  Mission accomplished.

Then I saw these cute yard signs that I wanted to try.  Next time they will be better...the first run is a learning experience.  I cut 6 circles on my Cricut...8.5" and 8".  Added lettering using my software and a font that I downloaded.  I ran to Lowes for dowel rods that would hold my circles.

Final touch....ribbons, fabric, rickrack....anything I wanted to use.  It has a "shabby chic" feel to it. 
I can't wait to see Sloaney tomorrow on her big day!
Happy Birthday, Sweet Little Girl!
XOXO,
Bella

Saturday, February 11, 2012

Red Valentine Treats & Blue Dog

A little friend of mine is having a Mickey Mouse birthday party today.  I found a free Mickey svg file and cut it with my Cricut.  I used it to decorate this pail for her to store her "stuff".

Happy 2nd Birthday Baby Peyton!

Valentine shirt for another little friend of mine.  I made one of these earlier this week and forgot to take a picture of it before delivering it.

I think the hearts make the design....cute!

I made more soap.  This time I used a silicone mold that has hearts, flowers, roses and butterflies on it.  I am able to make 4 hearts at one time.

The soap dries in about 30 minutes and then you are able to pop it out of the mold and make more.  I melt about 5 ounces of glycerin to make the 4 hearts.  It's easy and fun to make.

{A birthday gift from my daughter and son-in-law} 

 It's not a George Rodrigue but I bet you were fooled :)  When I taught French, I would teach my high school classes about our Louisiana native artist, George Rodrigue and his Blue Dog paintings.  We would learn about the inspiration for Blue Dog and the Cajun influence on Rodrigue's paintings.  After learning all about it each student would draw and color his own Blue Dog.  Several times I took my French Club to the Blue Dog Cafe in Lafayette and we would go to museum exhibits to see Blue Dog paintings.  I guess you could say I love Blue Dog. 

After many requests, my son-in-law painted me my very own Blue Dog.  Yes, he is talented and can paint just about anything.  This is suppose to be my Chihuahua, Yogi with Blue Dog....funny.
I love love it! 
If you would like to see more of Blue Dog, check this site out and take the virtual tour of his New Orleans Art Gallery.