Showing posts with label Crafts. Show all posts

Wednesday, August 1, 2012

Wrapping Up Some Things


I finished my House Warming gifts which included these Wampus CAT throws for 2 little guys.


And these throws come wrapped in a great piece of ribbon with Velcro to hold them closed.  I have always thought how I should monogram a name on the ribbons but have never taken the time to do it.  Well....


this time I did it.  I monogrammed both names on one piece of stabilizer.  It was so quick and easy.  Then I slipped them back on the throws.  I think it makes them really special.


Last night I started this shirt.  In case you can not tell the design called for two shades of purple thread.  {Who is in a darker purple}.  I knew it would be close on the medium purple thread but I was hoping I would have enough and not run out.  Well I did run out on "about".  I got as far as ab.....


Luckily I was going out of town today where I could purchase thread.  It is Sulky #1032 and Hancocks Fabric had 2 in stock!  and 30% off.  I was able to come home and finish my little shirt. Moral of this story...don't even try to stitch something if you think you may not have enough thread!


I'm also working on LSU cups...just a nice change of pace.


I want to find a better Fleur de Lis.

Fun, no pressure project :)

Happy Thursday!

Monday, June 25, 2012

Red, White & Blue

If you were to visit my house this week you would see a lot of Red, White & Blue.  We are getting ready for a Big 4th of July!  I hope you are getting ready, too.  None of my decorations are breath-taking or designer style but they are just what we like at our house and most of what you would see has been done by me.  So enjoy the humble tour of my patriotic decorations.
How does your family celebrate the 4th of July?


Happy Tuesday!
XOXO,
Karen


Monday, June 18, 2012

I'm Home

 I arrived home from Atlanta yesterday afternoon and I had a wonderful flight home.  The skies were sunny and no rain in sight.  Atlanta weather was absolutely gorgeous while I was there.  After the cool front moved in it was low humidity and temps were in the low 80's.  Just right for enjoying a short vacation with family.  We always spend a lot of time just visiting and catching up on family news.  We swam every day, shopped a little, cooked out, watched the entire Season 5 of Mad Men and oohed and aahed over my great-niece, Ella.
This morning I made a snack for our Bible Study Luncheon tomorrow.  It is July 4th Bark.  You can find the recipe Here.
Before I left, we finished this little project.  I saw it on Pinterest and just had to have one just like it.  I have a good bit of brick left over from building our house 25 years ago. 
We used some of that brick and placed it in the ground on its side.  Then filled the center with river rock.  The hardest part is getting a perfect circle.  I googled how to get a large perfect circle in order to find the best method.  I used a piece of string with a golf tee tied to each end.  If you want a 5 foot circle make your string 2.5 feet long. I put one tee in the middle and stretched the string out to find where each brick should be placed.  Yes, it took some time but I wanted it perfectly round (as nearly as possible).  I really want another one like this in my yard with pink begonias in the center.  How pretty would that look?
I told you I would share pictures of Atlanta but I didn't want to carry my camera with me so no pics of Atlanta.  However, I can share pictures of the great deals I found there.  I had been searching for garden stakes just like this one.  I found them on ebay for $25 each and almost ordered one.  I'm sure glad I didn't because I found the same one at Tuesday Morning for $9.99.  What a deal!

I found this one also.  I love fleur de lis.  It was $7.99
I don't think I'll ever pay full price for anything.  I'm going for the bargains :)
My sister-in-law loves Home Goods and so do I.  If I'd been in a car it would have been full of pretty things.  But when you fly you can't buy much extra.  This rode home in my lap.  Simple white serving pieces are so versatile.  I'm thinking salad dressing, maybe orange juice in this little pitcher.
We went to another Tuesday Morning near Buckhead Saturday.  I found these adorable polka dot pillow cases.  I will monogram some little girl's name on these.
And last but not least, I stocked up on more burlap.  I have several more things I want to make out of burlap.  There are 3 different colors...natural, cream and white.  At least I have a choice of colors now.

It's good to be home again!
Have a great Monday!
Karen

Tuesday, June 12, 2012

Anniversary Pillow

 My daughter saw a pillow like this on Pinterest and talked about how much she liked it.  So I went to YouTube (if you're not using YouTube for how to's, you're missing out).  I searched how to stencil on burlap.  Little did I know it would be so very easy.  So I practiced "my painting technique" (hehe) and it came out nicely.  Remember that this is a Shabby Chic/French Country look so it doesn't have to be perfect.  In fact you want it to look like it's been passed down from a grandmother or great-grandmother.

So here are the steps to make a stenciled burlap envelope pillow:
1) decide on the size pillow you want (I use pillow forms instead of fiberfill).  For this I used a 12"x16" form.
2) cut the front panel 1" larger in length and width.  So for a 12"x16" pillow I would cut my front fabric 13"x17"
3) Now make a stencil using your Cricut or any electronic cutter or buy a stencil.  I made my numbers 4".  I used my Plantin SchoolBook cartridge.  It is really a great cartridge.  Love the basic alphabet and numbers.  Using a temporary fabric adhesive, I adhered my stencil to the fabric.  (the spray will evaporate on its own in a few hours and leaves the fabric just as it was before spraying it.
4) I used white acrylic paint and a sponge brush.  My daughter wanted white numbers but I think black would look great, too.  I dabbed the paint on, remember it's a Shabby Chic look.
5) Let it dry.  Only takes a few minutes.  During this time I prepared the back of the pillow.
6) I used Muslin fabric for the back for 2 reasons: I ran out of burlap and I thought the Muslin would give it some stability.  My burlap is a loose weave so I was afraid the stitches might not hold too well but I was also out of burlap :)  It worked well.
7) Cut your back fabric 1" longer in length and 4" longer in width.  This gives you the extra fabric for the envelop opening.  So for a 12"x16" pillow I cut my back fabric 13"x 21".  I was adding 4" to the 17".  Does that make sense?
8) Now cut your back fabric in half vertically.  Hem the inside edges that will be the opening. ( You may want to watch a video on YouTube for that part)
9) Put front fabric and back fabric together (pretty sides touching each other).  Pin and stitch all around the pillow.  I used a 1/4" seam.
10) Clip your corners so that they will turn easily.  Turn pillow case to the right side, insert pillow form and voila a beautiful DIY stenciled pillow. 
I'm going to do a large initial pillow also for my daughter.  We will use a 14"x14" pillow form.  So I will cut the front 15"x15" and the back 15"x19".
Easy, easy!


I found this jute at WalMart the other day.  It's called Jute but it looks like burlap to me.  Maybe that's what jute is but I love it.  I'm thinking bows or making a wreath.  What do you think?  It is only 67 cents a yard.  I'm sure I'll think of something.

I'm leaving on a jet plane tomorrow :)
I'm heading to Atlanta to visit family.  It has become a summer ritual to visit my brother and his family out there.  He and my sister-in-law moved from Winston-Salem three years ago and I'm so happy they did.  Now they are much closer.  I plan to take lots of pictures to share.  My sister-in-law loves to shop and so we'll hit Ikea, HomeGoods, Tuesday Morning and all the other fun shops.  Maybe I'll get some good ideas and bargains.  Have a great rest of the week!

XOXO,
Karen

Friday, June 1, 2012

Grayson's Coming to Bella's!


Grayson is coming to spend the week with Bella & Papa Asa.  We are so excited! Grayson is old enough to attend Vacation Bible School this year so he and I will go every evening.  He is going to have such a great time at VBS because his teachers are the most wonderful ladies who love working with little folks.  Of course we will not spoil him one bit, but if he happens to want to eat while watching TV I personalized a bright red lap tray for him :)  He can color or eat on his tray.  I used polka dots and "Girls Are Weird" font for his name.


In the mornings before VBS, Gray will be learning to swim.  A good friend has a pool and her daughter will be teaching him basic swimming techniques.  I can't wait to see that little guy in the water.  It seems like yesterday that I took his mom and uncle Clint to swim lessons.  He has to be a champion swimmer because Bella and Papa Asa met each other while working as lifeguards.  We worked every summer during our college years as lifeguards so it's in his bloodline to swim.  (Hehe) 
I also made Little GrayMan a personalized tote for all of his cars, books, Legos or whatever he wants to put in there.  Once again I used "Girls Are Weird" font and added stars.  I used my Cricut and vinyl to personalize these things.


I saw this adorable activity chair on Pinterest and then found it online at WalMart. I had it delivered to our store....so easy to do.  Thank you WalMart for making it so easy to order online. (However, it took me over an hour to put it together) Won't he be soooo cute sitting in it and drawing a picture or coloring?  Ok, ok enough of being a typical grandmother....sorry.

I hope you all have a wonderful weekend!
XOXO,
Karen

Monday, May 21, 2012

More Bloomers for Sloaney

Did anyone see the cover picture of the new Pottery Barn Kids catalog that came out today?  An adorable little girl wearing monogrammed pink polka dot bloomers.  I must find a pattern without a center seam so I can monogram them.  After my first pair I couldn't stop and so I made a couple more. 
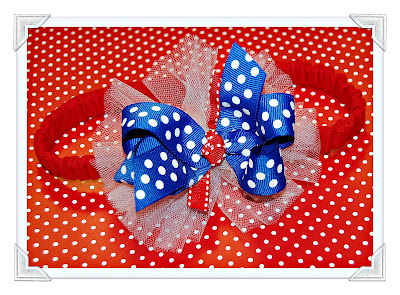
The pattern also includes instruction on making a headband.  I added a shabby flower rosette to this one.
These are my favorite ones.  The pattern called for single fold bias tape to use as a casing for the elastic on the legs.  I didn't have any bias tape.  My friend said that she always uses ribbon.  It works beautifully and is soft to the touch for children.  It worked like a charm!
I need to monogram a few tops to go with these.  I was thinking some type of patch with the name or initials on the patch....maybe an oval or circle patch using the mustard polka dot fabric.
Another headband.  This is the way the pattern showed it... with the little knot bow.


Remember this shirt for Memorial Day?  I made Sloaney a headband t match it.
These are a little time consuming but really fun to make and worth the time.  The headband is made from elastic covered in fabric so it is comfortable for little ones.
And another little project in the works.  A Memorial Day treat. 
I will share the finished design soon.

I hope your week is off to a great start!

XOXO,
Karen

Friday, May 11, 2012

Just About Finished


I took off a half day today because I needed some rest.  A long nap sure does help.  Tonight I wanted to finish my "girly" graduation gifts.  I like bright colors especially for teenage girls.  It is perfect for young college girls.  I monogrammed towels and put vinyl initials on a large pail.  Once again I used Monogram KK for the towels and pail.  The pail can be used for just about anything in a dorm or apartment.  So there it is.......finished!
And I'm off to sleep again.  I haven't caught up yet :)
Good Night!
Karen

Thursday, May 10, 2012

Mother's Day & Birthday Gifts


A few more gifts I've been working on.  These are for Mother's Day and one for a friend's birthday.  I used Monogram KK which is a free font from
Using my Sure Cuts A Lot software I cut the initials from vinyl on my Cricut.
It is a favorite font of mine and it actually cuts very well to be so curly. I think these make great gifts for any occasion and especially if a homemade cake is included. 
Happy Mother's Day Weekend!
XOXO,
Karen

Saturday, April 28, 2012

Shabby Chic Tote

 I have seen these all over Pinterest and have loved each one of them....the Halloween inspired ones, the Patriotic themed ones and the plain muslin ones.  I love just about anything with ruffles and then to put a flower on top of that....I swoon.  So late last night  I decided to try my hand at one.  This is where the inspiration and basic design came from
http://www.thefoglemanfamily.blogspot.com/2010/05/finished-object-friday-its-in-bag.html
 I had the black bag on hand so that is what I used.  I played with several fabrics until I got the look I wanted and these 3 fabrics did it for me.  My advice would be to pin your ruffles well.  The bottom ruffle goes on first and it is the hardest to sew on because it is so far down on the bag.  Then each row gets easier.  I think I would even consider opening the side seam if I did another one.  That would make sewing on the ruffles a breeze.
I used the same site for the fabric rosette tutorial.  I love it and I may keep it for myself {which I never keep or make anything for myself} 
So there it is....... a Shabby Chic tote bag. 
 Hummmm, I may want to give it away after all. 

I have had a glorious week and am ready to finish up another school year.  We only have 4 busy weeks left until summer!  I think I can make it :)

Have a great Sunday!

XOXO,
Karen